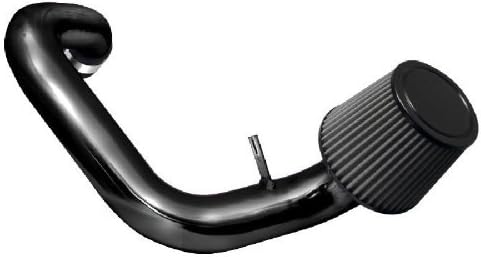
How to Install a Cold Air Intake on a Hyundai Tiburon: A Step-by-Step Guide
Installing a cold air intake (CAI) on your Hyundai Tiburon is one of the most popular and straightforward modifications you can make to improve performance. A CAI enhances your engine’s efficiency by allowing cooler, denser air to enter the engine, which can increase horsepower, improve throttle response, and give your car a more aggressive intake sound. This article will walk you through the process of installing a cold air intake on a Hyundai Tiburon.
Tools and Materials Needed
Before you start, gather the following tools and materials:
- Cold air intake kit (make sure it’s compatible with your Tiburon’s model year)
- Flathead and Phillips screwdrivers
- Socket wrench set with various socket sizes
- Pliers
- Ratchet extension (optional)
- Clean cloth or paper towels
- Safety gloves and glasses
Preparation
- Safety First: Ensure your car is parked on a flat surface and the engine is cool to the touch. Disconnect the negative terminal of the battery to prevent any electrical accidents while working on the vehicle.
- Read the Instructions: Each cold air intake kit may have specific instructions. Review them thoroughly before beginning the installation to familiarize yourself with the process.
Step 1: Remove the Stock Air Intake System
- Locate the Airbox: Open the hood and locate the stock air intake system. It’s usually positioned on the driver’s side, near the front of the engine bay, leading to the throttle body.
- Disconnect the Mass Airflow Sensor (MAF): The MAF sensor is attached to the stock air intake tube. Carefully disconnect the electrical connector by pressing the tab and pulling it away from the sensor.
- Loosen Hose Clamps: Use a flathead screwdriver or a socket wrench to loosen the hose clamps securing the intake tube to the throttle body and the airbox.
- Remove the Airbox: Unbolt the airbox from the engine bay using your socket wrench. Depending on your model, you may need to remove additional components, such as the resonator box or intake snorkel, to free the airbox. Once unbolted, lift the airbox out of the engine bay.
- Detach the Stock Intake Tube: After the airbox is removed, disconnect the stock intake tube from the throttle body and remove it from the engine bay. Be cautious not to damage the MAF sensor if it’s still attached.
Step 2: Install the Cold Air Intake System
- Prepare the Cold Air Intake: Depending on your kit, you may need to assemble parts of the CAI before installation. This could include attaching the air filter to the intake pipe or fitting the MAF sensor onto the new intake tube.
- Install the MAF Sensor: If your new intake requires it, transfer the MAF sensor from the stock intake tube to the new cold air intake tube. Ensure it’s installed in the correct orientation, as indicated by the instructions.
- Position the Cold Air Intake Tube: Place the new intake tube into the engine bay, routing it where the stock intake was previously installed. Secure the tube to the throttle body with a hose clamp but do not tighten it fully yet.
- Install the Air Filter: Attach the air filter to the end of the intake tube. If your cold air intake is a true CAI, the filter will be positioned in a lower, cooler area of the engine bay or behind the bumper. Ensure it’s securely attached with a hose clamp.
- Secure the Intake System: Align the intake tube properly and ensure that it’s not touching any moving parts or resting against any hot surfaces. Tighten all hose clamps, securing the intake tube to the throttle body and the air filter to the tube. If your kit includes mounting brackets or supports, use them to stabilize the intake tube within the engine bay.
- Reconnect the MAF Sensor: Reconnect the MAF sensor to its electrical connector. Ensure the connection is secure, as this sensor is crucial for proper engine operation.
Step 3: Final Checks and Testing
- Double-Check Everything: Go over your installation, ensuring that all connections are tight and secure. Check for any loose bolts, clamps, or connections.
- Reconnect the Battery: Reattach the negative terminal to the battery. This will reset the engine’s computer, allowing it to adjust to the new intake system.
- Start the Engine: Start your Tiburon and let it idle for a few minutes. Listen for any unusual noises, such as air leaks or rattling, and inspect the engine bay for any signs of improper installation.
- Test Drive: Take your Tiburon for a test drive to feel the difference. Pay attention to the throttle response, acceleration, and engine sound. The cold air intake should provide a noticeable improvement in engine performance and sound.
Maintenance Tips
- Regularly Check the Air Filter: Over time, the air filter may become clogged with dirt and debris, reducing its effectiveness. Inspect and clean the filter regularly, and replace it as needed.
- Monitor the MAF Sensor: Ensure the MAF sensor is clean and functioning correctly. A dirty or faulty MAF sensor can lead to poor engine performance and fuel efficiency.
Conclusion
Installing a cold air intake on your Hyundai Tiburon is a relatively simple modification that can yield significant performance benefits. With the right tools and careful attention to detail, you can complete the installation in a few hours. This mod not only enhances your Tiburon’s performance but also adds a more aggressive engine sound, making your driving experience more enjoyable. Whether you’re a seasoned car enthusiast or a beginner, this project is a great way to start customizing your Tiburon.
Looking for a Cold Air Intake? Get one by clicking the image below

